
Categories Overview
Categories, also referred to as property types, are the different categories of listing you want to display on your website. These categories will vary depending on your business needs. For example, many traditional real estate agents will require categories like “Residential”, “Condominiums”, “Waterfront”, etc. Property management and rental agencies may require categories like “Apartments”, “Timeshares”, “Rooms for Rent”, “Houses for Rent” and similar.
You can create as many categories and subcategories as you require for your needs; however, be aware that having too many categories is confusing for users and will impact the usability of your site.
Listings can be assigned to multiple categories and subcategories. If a property is listed in a given subcategory, it will also be found in searches for the parent category. You can upload icons for each category and subcategory to help your users identify your offerings.
Adding a Category
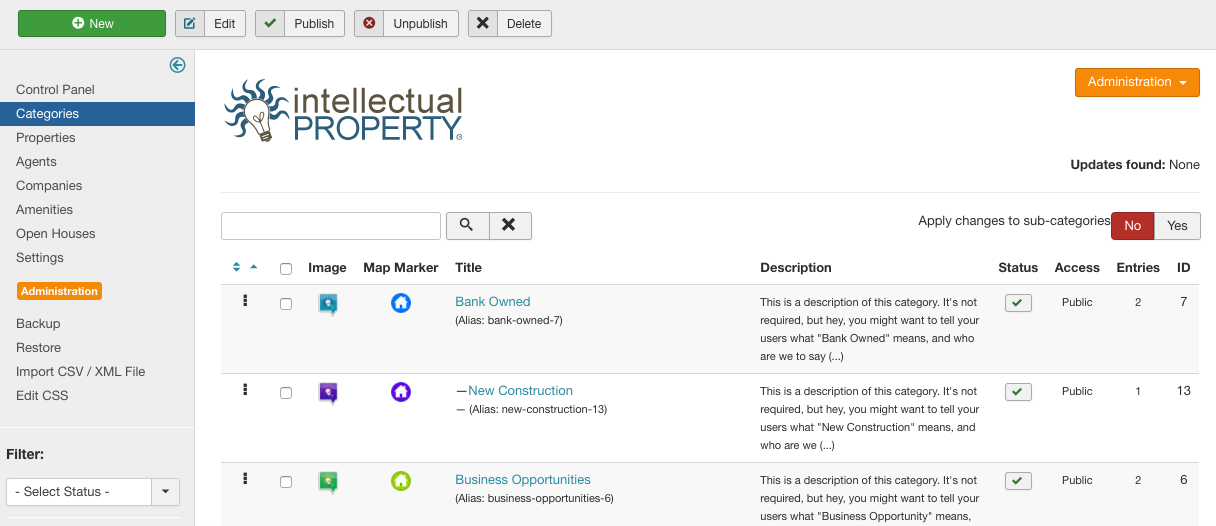
To add a category, click the New button in the upper left of the Categories panel (Figure A). You will open the Add Category dialogue (Figure B).
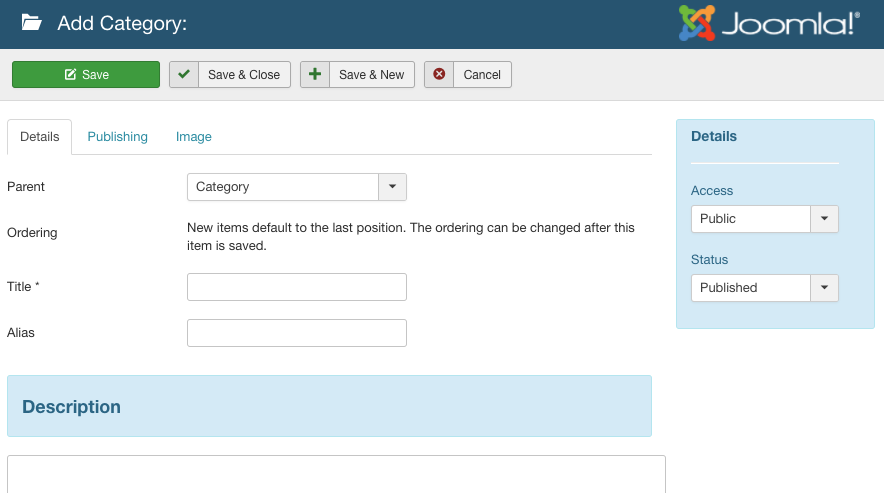
If you are creating a subcategory, select the parent catalog from the Parent dropdown. If you are creating a top-level category, leave this dropdown on “Category”. Provide a title in the Title text field. This should be the short descriptive title of the category (eg. “Waterfront” or “Apartments”).
The Alias field determines what SEF tag will be used for the object, when default Joomla SEF URLs are enabled. If you do not add an Alias, one will be auto-generated for you. For example, if the category name is “Bank Owned” the system will create an alias of “bank-owned”. Aliases should not contain spaces or special characters.
In the Description text area, you can provide a longer, more detailed description that will appear in the category listing view and on the category property page. Click the save button at the top right of the Add panel to save the object, or choose Cancel to exit without saving.
Adding Category Image
To add an icon or image for your property type, select the ‘image’ tab and select an existing image or upload a new image. You may also want to add a custom map marker for the category (Figure C).
Click on the Upload button to select and upload an icon file from your local machine. GIF, JPG and PNG files are accepted. The icon files are resized automatically when uploaded to the specified ‘Category Photo Width’ in the Intellectual Property settings. This also applies to agent and company photos (Agent photos resized to ‘Agent Photo Width’ setting, and company photos resized to ‘Company Photo Width’ setting).
If you have already uploaded multiple icon files, or intend to use the same icon file for multiple categories, click on the Select Image button to bring up the dialog in Figure C. From this panel you can select the icon file you wish to use for the new category.
Adding Category Map Icons
You can specify a unique category icon for each category, which will be used as map markers in the Advanced Search views and any map view display. It is recommended to keep icons less than 150px square for best results.
Edit Category
To edit an existing category, simply click on the name of the category from the list of categories in the Category control panel, or select the category by checking the box to the left of the category name and click Edit in the top right of the panel. To unpublish a category, click on the green checkbox to the right of the category’s name. To delete a category, select the category by checking the box to the left of the category name and select Delete from the options in the upper right of the panel.