Settings Overview
The Work Force Settings dialogs are among the most important for controlling how your extension looks and behaves. We will cover the various tabs of the Settings panel in order.
General Settings
As the name would indicate, General Settings are the basic parameters for Work Force. They are:
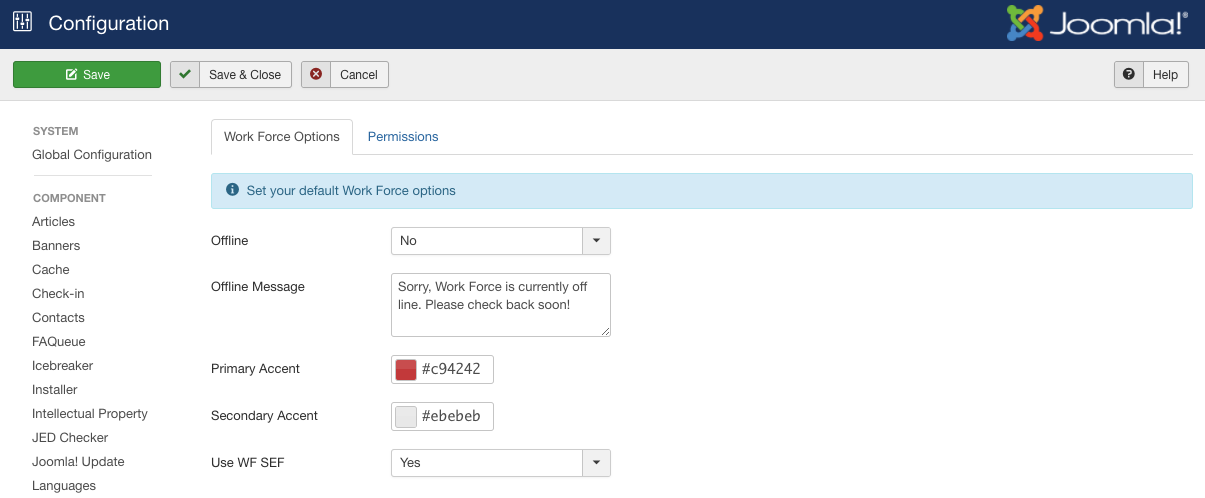
Offline Settings
- Offline: Set this to no to disable all Work Force functionality on the front-end of the site.
- Offline Message: This is the message that users will see if Work Force is offline.
- Primary Accent: The primary accent is used to customize the color of Work Force headers or featured containers. The accent color settings are not required and can be customized via css as well.
- Secondary Accent: The secondary accent is the color offset of alternate rows or columns - normally should be a light color. This is not required, and can be customized via css as well.
- Use WF SEF: Setting this option to ‘yes’ will tell Work Force to use it’s custom route helper to create SEF urls when the menu structure isn’t ideal for SEF/SEO. This is only needed when using the Joomla search engine friendly urls - it will not be used if using a 3rd party SEF extension such as sh404.
Employees Settings
- Show Alpha Search: Set this to Yes if you would like the alphabetical search bar to display in list views. This allows you to select a letter and Work Force will display all employees with a last name starting with that letter
- Employees Per Page: Set the limit of employees to show per page - results will be paginated based on this number
- Employee Columns: Set the number of columns to show in a full-width view. The layouts are responsive and will change when the window size changes, but this is the default full view column number
- Featured Employees: Set the number of featured employees to display (if any)
- Featured Position: If the above setting is not ‘0’, select whether to show featured employees above or below the list of other employees
- Show Full Bio: This will determine whether to show the full employee bio on the list views - this would make sense if the employee bios are fairly brief, otherwise it’s usually best to use the ‘Overview Characters’ setting below
- Overview Characters: Maximum number of characters of the employee bio/description to show on list views. Longer descriptions/bios will be truncated to this number of characters
- Overview Contact Bar: Determine whether or not to show the contact bar - email, phone, etc in list views
Departments
- Department Columns: Select the number of department columns to display in the all departments view
- Department Show Desc: Select whether or not to show the department descriptions
- Department Show Employees: Choose to show or hide the employees list in the ‘all departments’ view
Images
- Max Image Size(kb): Set the maximum image size in kb (2000kb = 2mb)
- Dept Photo Width: Set the default photo width that department images will be resized to when uploaded
- Dept Image Align: Set the department photo alignment show in department list views - left or right aligned
- Employee Photo Width: Set the default photo width that employee images will be resized to when uploaded
Show/Hide Options
These options are all straight forward - simply select which items to show and which items to hide by default. These options, like others, can be overridden per menu item.
Defaults
Another straight forward set of options - simply set your default values which will be auto-populated when adding a new employee or department. For example, if all of your employees are in ‘Arizona’, you would set the default state to ‘Arizona’ so when you add a new employee that field will already be selected.
Front-end Editing
-
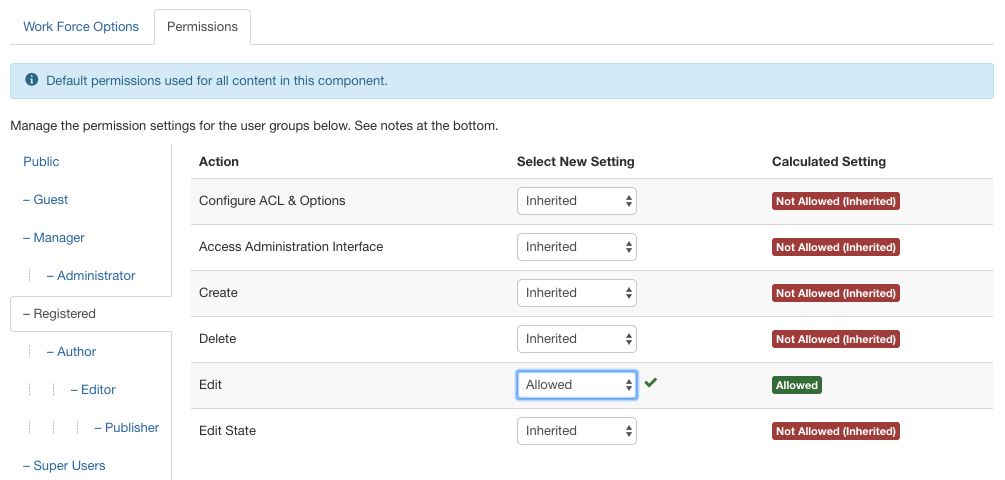
Allow User Edit: Select whether or not you want users to be able to edit their profiles via the front end of the website. If this option is enabled, there are a couple things to take note of - to allow non-admin users to edit their profiles on the front end, the following must be true:
- The employee/user must have a Joomla user linked to their employee profile (the Joomla user is required for them to login and access the front end editing)
- In the Work Force configuration ‘Permissions’ area, you must allow the desired user group to edit (Figure B)